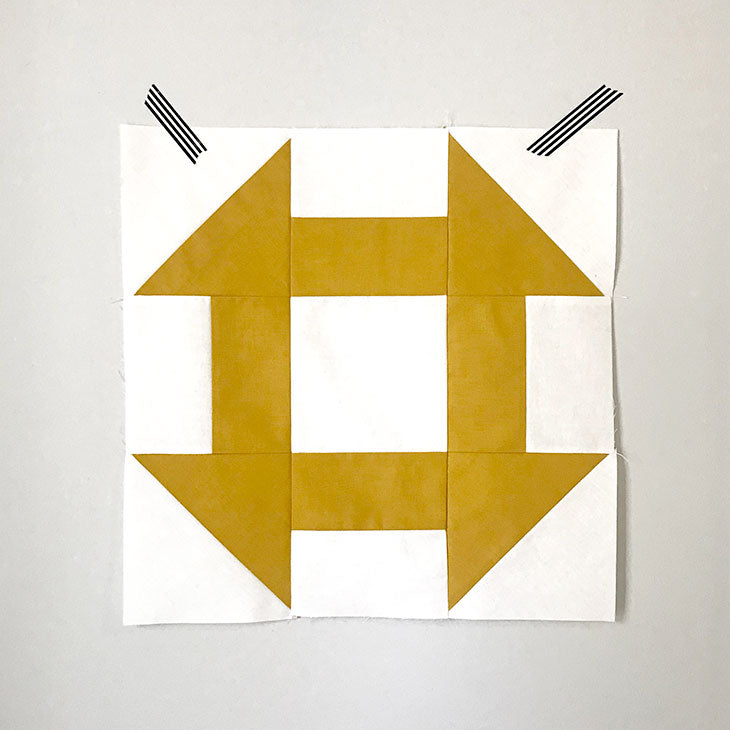
What's a Farmhouse sampler quilt without a churn dash block?
In a word: incomplete. So today, we'll be adding a big 15" Churn Dash quilt block to our Farmhouse Sampler.
Let's go!
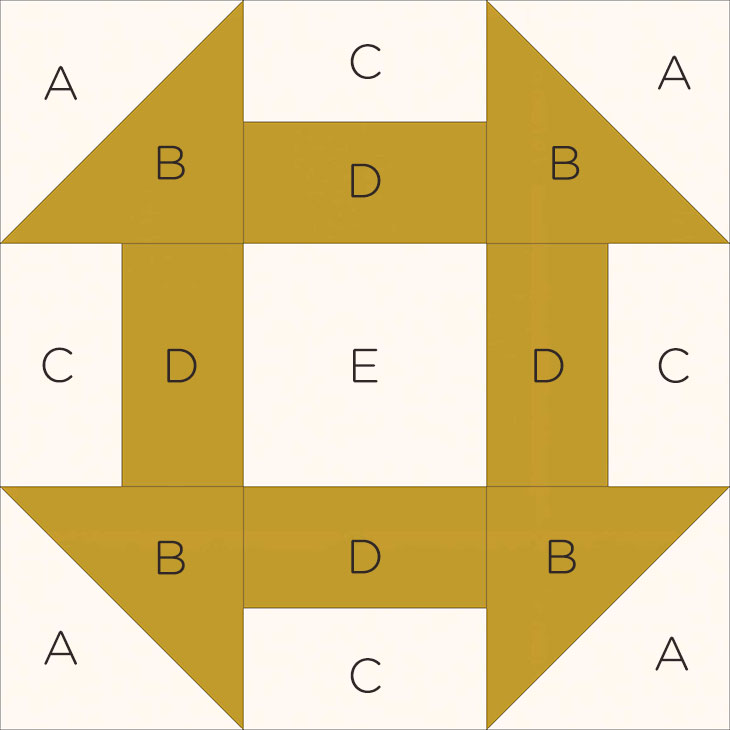
CUT:
- one (1) 8-3/4" square from A
- one (1) 8-3/4" square from B
- four (4) 3" x 5-1/2" rectangles from C
- four (4) 3" x 5-1/2" rectangles from D
- one (1) 5-1/2" square from E
PRESS. With a hot iron (no steam, as it distorts the fabric), press your blocks to get rid of wrinkles and creases.
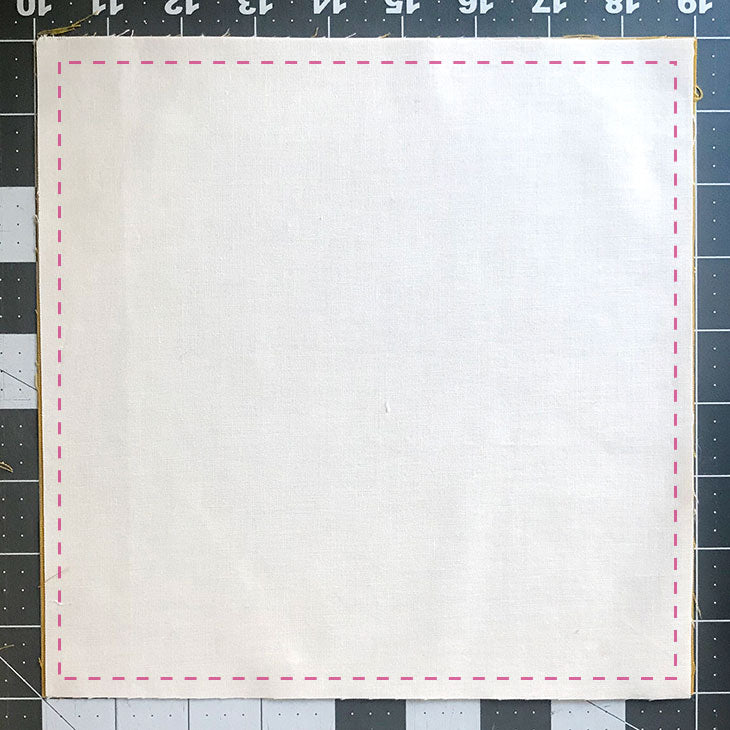
PLACE RST and SEW. Place your "A" and "B" blocks RST and sew 1/4" seam around the outside edge, as shown above with the pink dashed line.
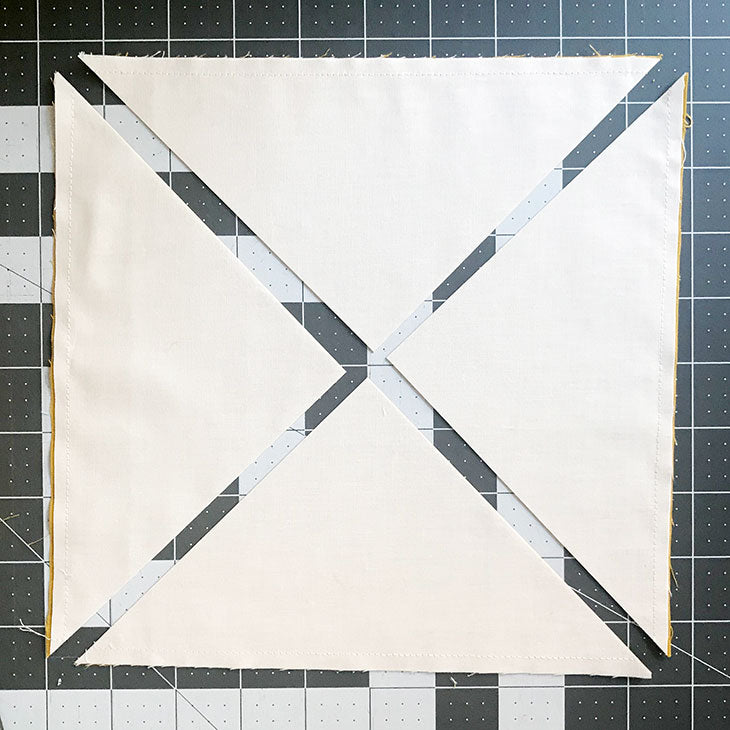
CUT ON DIAGONALS. With your rotary cutter and a long ruler, cut through the corners of your block on both diagonals. You'll end up with 4 HST units.
PRESS. With a hot iron, open your blocks and press your seams to the dark side.

TRIM. With a square ruler, trim your "A/B" blocks down to 5-1/2" square. Remember to line up the diagonal line on your square ruler with the diagonal seam on your block.
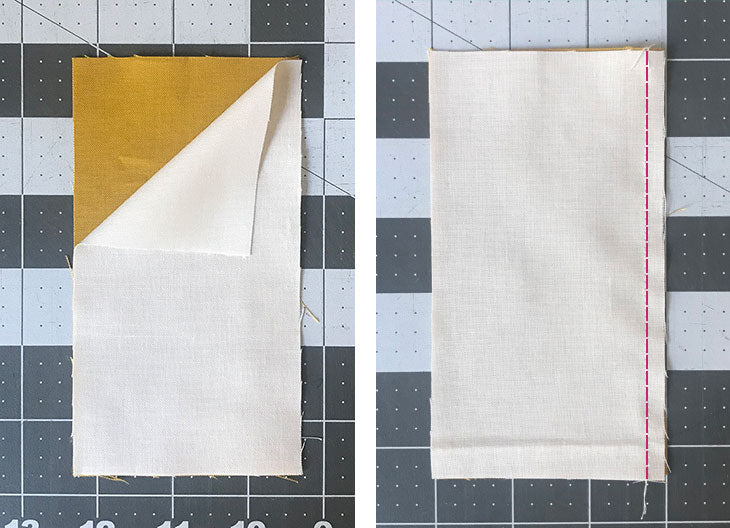
PLACE RST and SEW. Place your "C" and "D" blocks RST and sew 1/4" seam along one of the long edges (as shown above, right).
PRESS. With a hot iron, press your blocks with seams to the dark side.
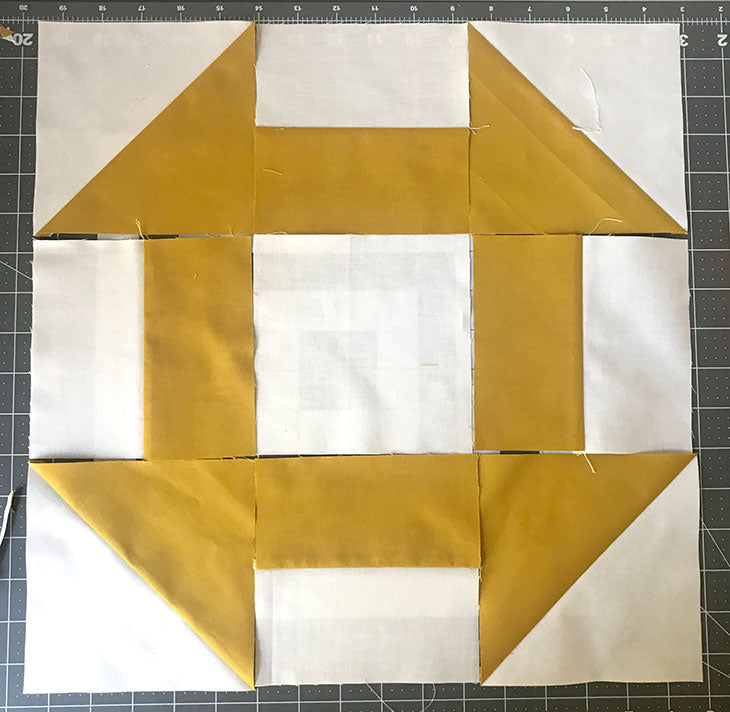
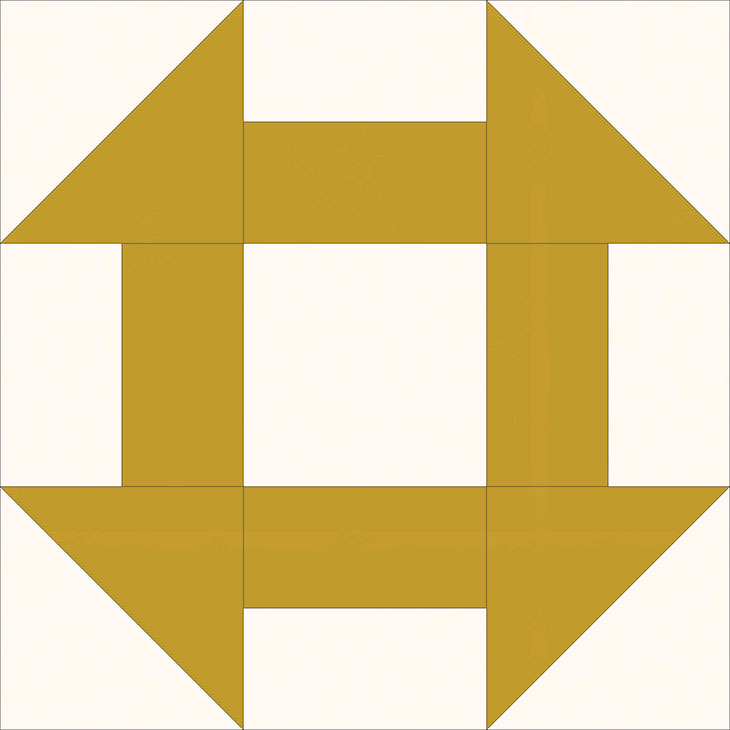
LAY OUT and PIECE. Using the block diagram as a guide, lay out your block. Next, piece your blocks together in rows using 1/4" seam allowance.
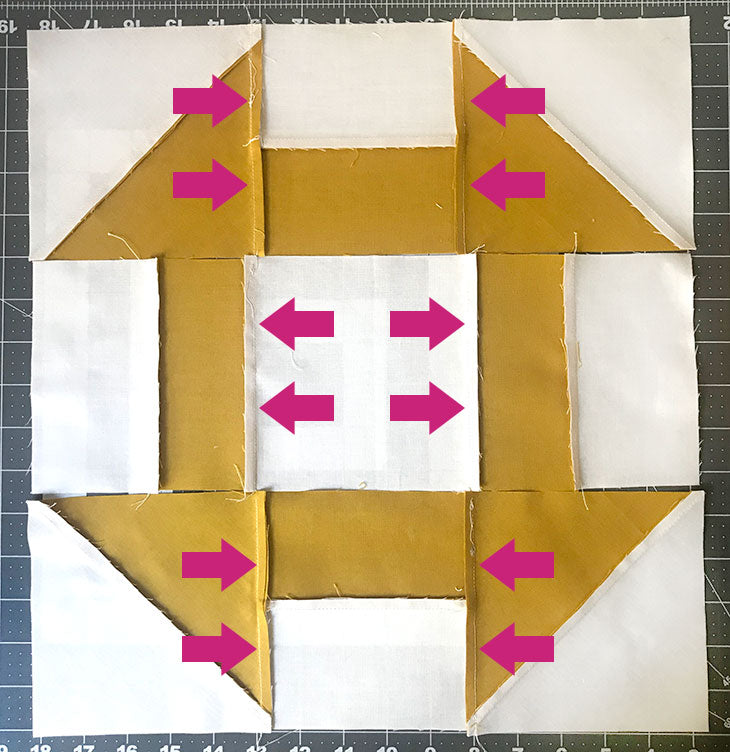
PRESS. Once you have all 3 rows pieced, press your blocks. Alternate the direction you press your seams. On this block, I press the seams toward the inside on row 1, toward the outside one row 2, and the inside on row 3. This will let me nest my seams when I piece my rows together and give me perfect points.
PIECE ROWS. Piece your rows together to make your block. And you're done!
Be sure to pop over to Instagram to share your blocks. Just add #farmhousesamplerquilt to your image description so we can connect with you. It's that easy!