This is it, y'all... the final installment of the Bloomerie Jelly Roll Strip Quilt quilt-along! The only things left to do are squaring up the quilt (again) and making & attaching the binding. (And then, of course, snuggle under the newest quilt on the block!)
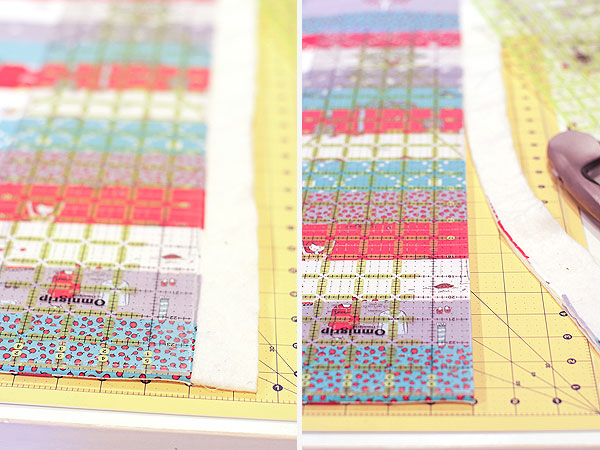
So let's start by squaring up the quilt one last time. We're going to be using the same basic principles we used to square up in Part 4. To sum up, fold the quilt in half, use your rulers to determine your cut line, and trim the edges. (Always check and double-check before you cut.)

Once we've done that, we'll need to figure out how much binding we'll need for our quilt. To do this, measure the outside perimeter of the quilt and then add 10" - 15" for good measure. Here's the math for my quilt:
- Quilt size = 42" x 56"
- Perimeter = 42 + 56 x 2 = 196"
- Binding needed = 196 + 12 = 208"
So now I know I need 208" of binding to do this quilt. And since we're using a few of our leftover jelly roll strips, we now need to determine how many strips are needed to get 208". So here goes a little more math:
- Jelly Roll Strip Length = 42" (each strip is a little different, so I'm taking the length of my shortest jelly roll strip minus 1" for the selvages, which we'll trim off)
- How many strips do I need = 208 ÷ 42 = 4.95... (208 is the binding needed from above, 42 is my jelly roll strip length)
- Round up that number = 5
So now we know we need 5 jelly roll strips for this 42 x 56" quilt. Let's start making the binding.

Grab your 5 jelly roll strips and trim off all the selvage edges, like shown above.

Grab 2 of your jelly roll strips and place them right sides together as shown above. All your edges should line up. With your ruler, mark a line from corner to corner. Pin or clip your strips if necessary to keep them in place. Using your sewing machine, stitch along that line.

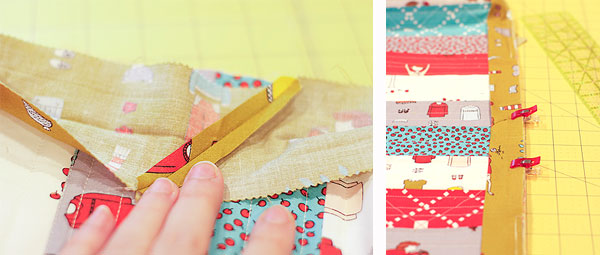
When you're done, you'll end up with a piece like this that is joined on the bias (front side is on left, back side is on right). See that triangle on the right side? We'll be trimming that off in the next step.

With your ruler, line the 1/4" ruler mark with your stitch line. With your rotary cutter, trim off the excess. And you'll be left with that cute little triangle -- and a perfect 1/4" seam allowance.
Repeat these steps for all strips until you end up with 1 long piece.

Take your 1 long binding strip over to the ironing board and press all those bias seams open. Then, fold the strip in half and press along the entire length, wrong sides together. The picture on the bottom shows the piece after it's been pressed. Just wanted to show you the crease. Keep yours folded together.

Now, grab your quilt binding and let's clip or pin the binding to the entire perimeter of the top of the quilt. Align the raw edges of the quilt and the raw edges of the binding strips.
Next, we want to make sure none of the bias seams end up at the quilt corners... so start Wonder Clipping the binding somewhere along the middle of one of the sides or the bottom edge. I chose to start on 1 of the long sides, and the black arrow shows my starting and ending points, with the excess pulled up to show you. When you're clipping the binding to the quilt, if any of your bias seams end up within a few inches of any of the 4 corners, adjust your starting point so no seams end up near the corners.

To go around the corners, fold the strip up, creating a diagonal fold. Finger press (use your finger like an iron to press a crease), and keeping that diagonal fold in place, bring the strip back in line with the next quilt edge. (See my lovely illustration above.) You'll do the same thing when you're stitching the binding to the front of the quilt.

Now, with your binding clipped/pinned to the perimeter of the quilt, power up your sewing machine and let's start attaching the binding to the front of the quilt. Start stitching about 6" from the beginning of your binding, using a 1/4" seam allowance. (You'll want to leave those 6" available so we can piece the beginning and end of the binding strip together.)

When you reach a corner, stop 1/4" before you reach the end and then stitch a diagonal line to the corner. (Left image shows me stopping 1/4" from the end; right images shows me stitching diagonally down to the corner.) Stitching this diagonal line with help us make the diagonal fold.

When you reach the corner, fold the strip to create a diagonal fold. Finger press and then while keeping the diagonal fold in place, pull the strip in alignment with the next edge. (See above.) Continue stitching 1/4" seam allowance on the new edge. Repeat this all around the quilt, until you get to within 10-15" of where you started stitching. Stop stitching when you get that close because we'll need to join the loose ends of our binding strips. Backstitch at the end and remove the quilt from the sewing machine.

Starting with the first binding strip (where we started stitching it to the quilt), lay it in place along the quilt's edge. Do the same for the other binding strip tail, but lay it on top of the first strip. (See left image above.) By finger pressing, crease the second binding tail where it meets the first tail's end. From that crease, measure 2 1/2" (which is the width of our jelly roll binding strip) and mark it with a disappearing marker.

Cut a straight line along your marked line. (You can very faintly see my crease mark above. Look between the red and white striped scarf and the red sweater. Just to reiterate, I measured 2 1/2" from that crease mark to make my cutting line. You can see that the 2 binding strip tails overlap. This is what we want. Check and double-check before you do any cutting.)

Open up the binding strip tails and place them with right sides together. Pin or clip these strips together, and using your ruler and disappearing marker, draw a diagonal line as shown above. (Mine is a faint white line.)

Before we stitch over this diagonal line, let's make sure our binding isn't twisted. Fold the strip back in half and make sure it lines up with the quilt's edge without any twisted fabric. If it's right, head on over to the sewing machine and stitch on top of your diagonal line.

Remove the quilt from your sewing machine. Now it's time to trim that triangle off, leaving a 1/4" seam allowance. Use the same technique that we did in the beginning of this tutorial (line your 1/4" ruler mark on your stitch line).
Use your fingers to press open the seams. (You can also press with a warm iron if needed.) Fold the binding closed and return to your sewing machine to finish stitching the binding onto the quilt top.

Alright, we've made it to the final step: attaching the quilt binding to the back. Pull out those handy Wonder Clips and fold the binding over to the back side of the quilt (left image above). You can also pin it or press it with an iron to help keep the shape as you hand stitch. Start with needle and thread in hand and use a thread length that's comfortable for you to work with. (I usually work with a yard at a time.)
Put a knot at the end of your thread. Now let's hide that knot in our quilt sandwich under the binding -- so it's completely hidden.
Next, we're going to ladder stitch all the way around, taking stitches that are 1/8" - 1/4" long. Nothing bigger than that. Pull the needle through the folded part of the binding (middle image), then take a stitch in the quilt sandwich -- just through the batting and backing layers and not the quilt top (right image).
When you're stitching through the quilt sandwich layer, make sure it's just to the outside of the stitch line created by attaching the binding to the front. (You can see my stitch line under the binding in the right image.)

By using a ladder stitch, we're able to hide our threads completely. I've drawn a little picture of a ladder stitch above so you can see how this is going to work.

And gosh, look at that! We're all done! Can't wait to throw mine in the washing machine... I love that crinkly look quilts get after being washed.

I hope you've enjoyed this tutorial! If you have any questions about any of the steps, leave a comment for us and we'll reply.
--------------------------------------------------------------------
Jelly Roll Strip Quilt quilt-along: Part 6

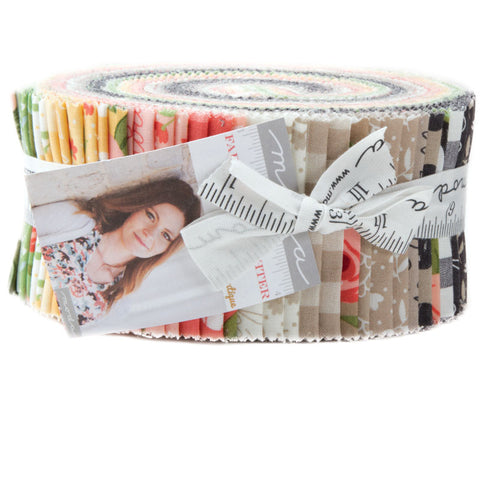 Pretty nifty, huh? But you might still be wondering what this really looks like. So just imagine 40 strips of fabric, already cut to 2.5" wide and 44" long. Now roll them all up together and you get this adorable jelly roll, spirals and all.