Did y'all know that we love what we do?
It's true! And we really love hearing from people who are new to quilting and are looking for a few tips on getting started. We love it so much that we thought it might be nice to share with the rest of the world!
There really are lots of wonderful perks to running Bloomerie Fabrics. Even though we operate strictly online, we do get the pleasure of 'meeting' beginning quilters and sewists who are excited to get started. And like any time we try something new, we don't always know what we'll really need. Not a list of the things experienced or specialized quilters need -- but the basics that whet our appetite, allow us to get started, allow us to successfully cut, piece, bind and quilt, and give us a collection of tools and supplies that we can build on as we get more serious about quilting.
So we've decided to put together this post to welcome new quilters (YAY!) and give you the low down on what must-have tools and supplies you're going to need for your first quilt.
Cutting Tools
Let's start with the holy trinity of cutting tools: self-healing cutting mat, rotary cutter and scissors. These are absolutely essential for quilting at all levels.
Self-Healing Cutting Mat
When it comes to quilting and sewing, there is no other tool used more frequently than the self-healing cutting mat -- sewing machine aside.
These are those kind-of-hard-but-still-bendy gridded mats you may have seen in craft and fabric stores. They manage to withstand the abuse sustained from the sharp blades of rotary cutters, time after time. (Side note: They will eventually need to be replaced, depending on how frequently you cut. We happen to cut A LOT -- so we require a new one once every 2 years or so. The average quilter should be able to go a lot longer than that!)
They come in a variety of sizes, from small (like 8" x 8") to large (like 36" x 72" and bigger). The size you choose is a matter of personal preference and space, but we recommend at least an 18" x 24" or 24" x 36" if you have the space.
Rotary Cutter
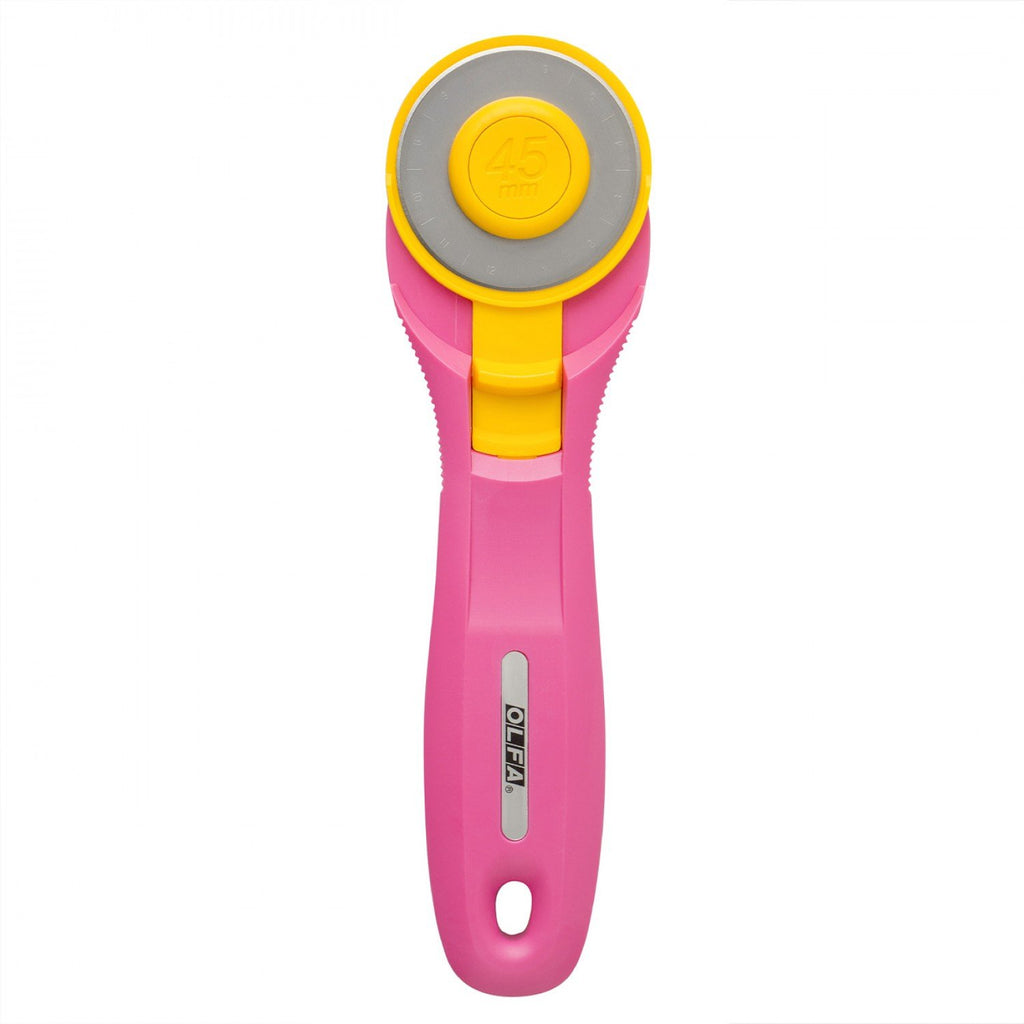
Precise cuts are key for quilting -- and the best way to get these is with a rotary cutter.
When you shop for one, you'll probably be surprised by the number of options available. But we're going to share a few tips to help you cut through the variety and quickly hone in on a great first rotary cutter.
Size - Rotary cutters typically come with either a 28mm, 45mm or 60mm blade. Stick with a 45mm for your first one.
Safety - This is a big one -- especially if you have kids or like having your fingers. (And we suspect that pretty much covers everyone!) You'll find some rotary cutters rely on pressure to automatically hide the blade when not in use, some rely on a latch or other manual mechanism that you'll engage and disengage to hide/reveal the blade, some will come with a blade cover, and... believe it or not... some have nothing. I've used the first two mentioned here and they're both just fine. My personal preference, though, is the one with a manual safety latch since accidental pressure won't reveal the blade and cause anything unexpected. (Can you tell I have kids?)
Feel - Once you've narrowed it down to size and safety options, try holding the remaining 'prospects' in your hand to see how they feel. And take note if it's for right, left or right- and left-handed people. Choose appropriately.
Scissors
I'm guessing you probably have a pair or two of these laying around the house right now. As long as they're not the kid ones, they'll do just fine for someone starting out. Just make sure they're gunk-free and are reasonably sharp. (You can always do a little home-sharpening of your scissors by folding a piece of aluminum foil a couple times and then cutting some straight lines in it. It's not a professional-grade sharpening, but it will help out.)


