Farmhouse Sampler - Block 7 (Flying Geese)
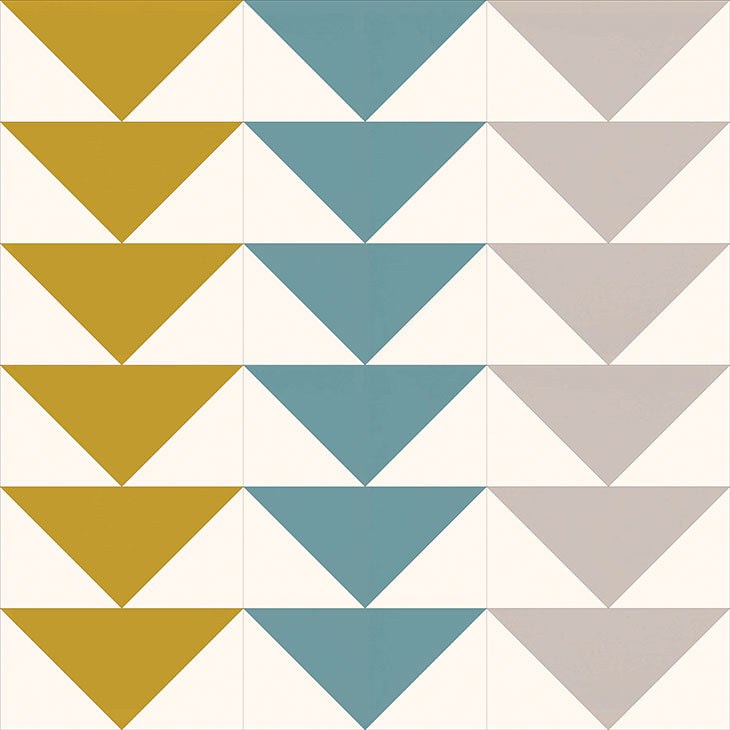
Happy Saturday! Block 7 in the Farmhouse Sampler quilt is here: Flying Geese.
As always, we encourage you to pop over to Instagram to add your finished blocks to the #farmhousesamplerquilt hashtag. It's fun to see how choices in color and fabric can change the look of the quilt -- and we would REALLY love to see yours.
Without further ado, let's get to it.
CUT:
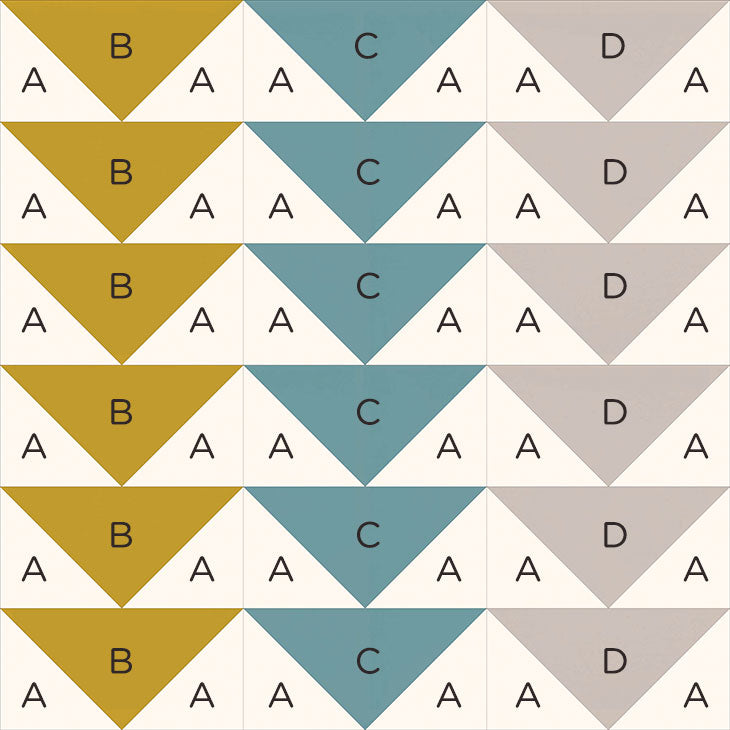
- eighteen (18) 3-3/8" squares from A
- two (2) 6-1/4" squares from B
- two (2) 6-1/4" squares from C
- two (2) 6-1/4" squares from D
PRESS. Once you've got your blocks cut, press with a hot iron (no steam) to remove wrinkles and creases.
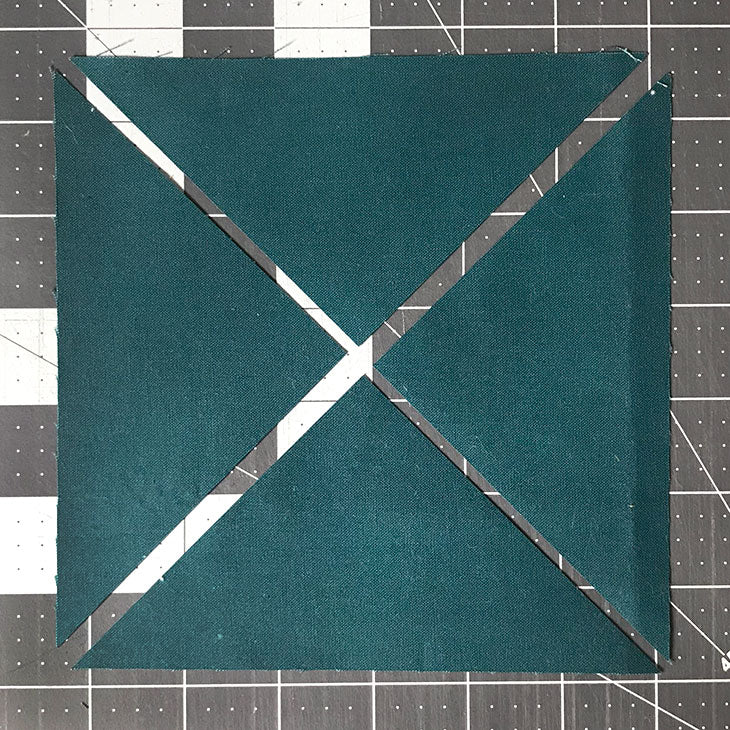
CUT. Gather your B, C, and D blocks (6 total). Using your rotary cutter and ruler, cut each of these blocks on both diagonals, as shown above. Each block will yield 4 triangles.
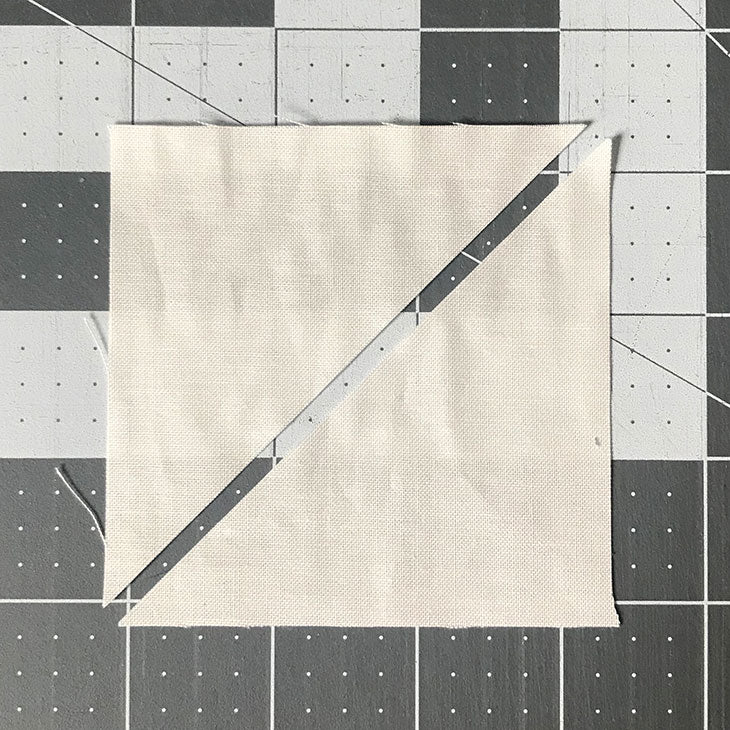
Now, gather your 18 "A" square blocks. Using your rotary cutter and ruler, cut each of these squares on the diagonal (just once). Each will yield 2 triangles, giving you a total of 36 once all are cut.
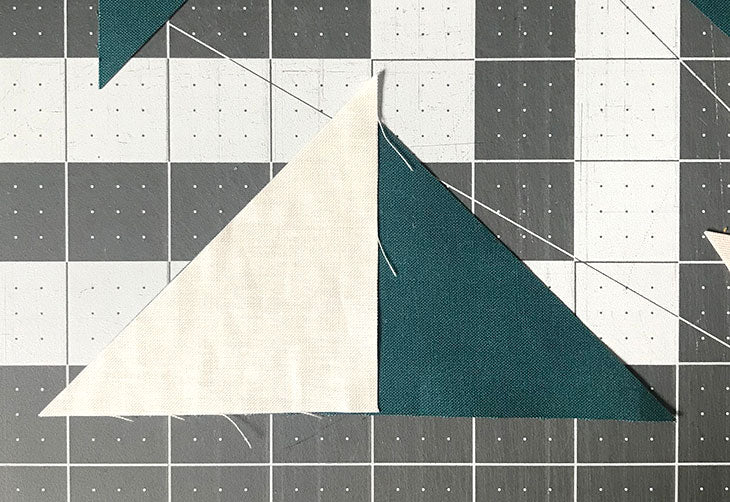
PLACE RST and SEW. Place 1 "A" block RST with 1 "B" block, lining up the blocks along the bottom and diagonal edges as shown above. The "A" block will overhang a little at the top point. With your sewing machine, sew 1/4" seam allowance along the diagonal edge.
Repeat this process for all B, C, and D blocks.
Take your time sewing accurate seams while you're piecing. A little extra time here will mean your flying geese units -- and your finished block -- will come out looking great without having to fiddle too much.
PRESS. With a hot iron (no steam), press your seams up (toward the white side).
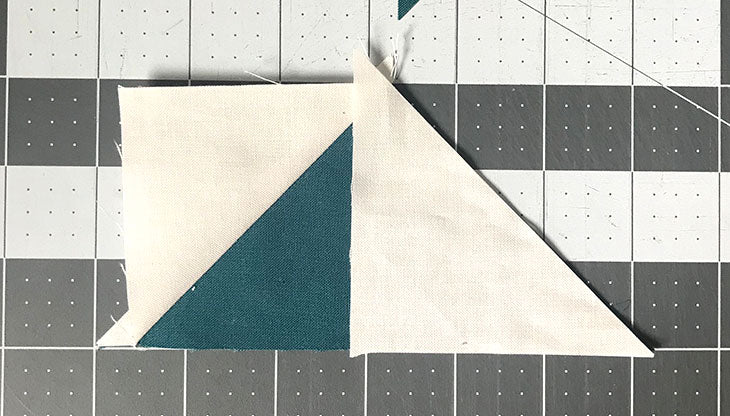
PLACE RST and SEW. Now let's sew the other triangle to each flying geese unit. Place 1 "A" block RST with 1 "B" block, lining up bottom and diagonal edges. Sew 1/4" seam allowance along the diagonal edge.
Repeat this process for all B, C, and D blocks.
And again, take your time sewing accurate seams.
PRESS. With a hot iron, press your seams.
TRIM. Trim off dog ears from your flying geese units.
At this point, each unit should measure 3" x 5-1/2". Trim excess off blocks, if necessary.
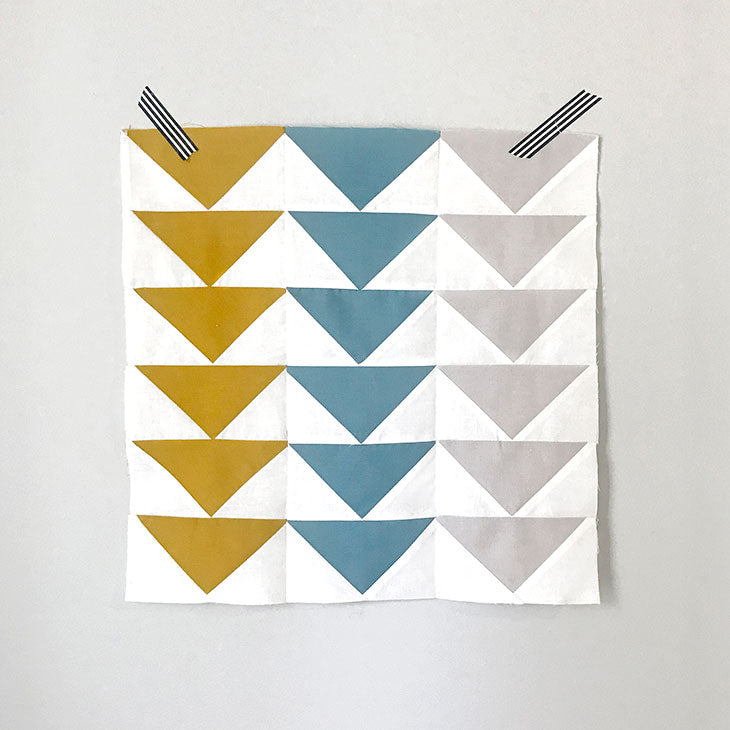
LAY OUT. Using the block diagram, lay out your Flying Geese block.
PIECE, PRESS, REPEAT. Working in columns, piece your flying geese units, RST, in pairs using a 1/4" seam allowance. Then piece your pairs into columns. Once you have a column, press your seams in 1 direction. (You'll want to alternate the direction your press your columns so you can nest your seams when you sew all 3 columns together.)
Once you have 3 columns, piece those together to complete your block. Give it a good press and you're done!
Just recently found your site. Love this quilt!! Am using leftover fabric to make my sampler quilt scrappy:) On this block there will be leftover flying geese blocks in each of the four colors, right?
Thanks for your designs!! Just love traditional blocks:)
Cindy