Farmhouse Sampler - Block 5 (Summer Winds)
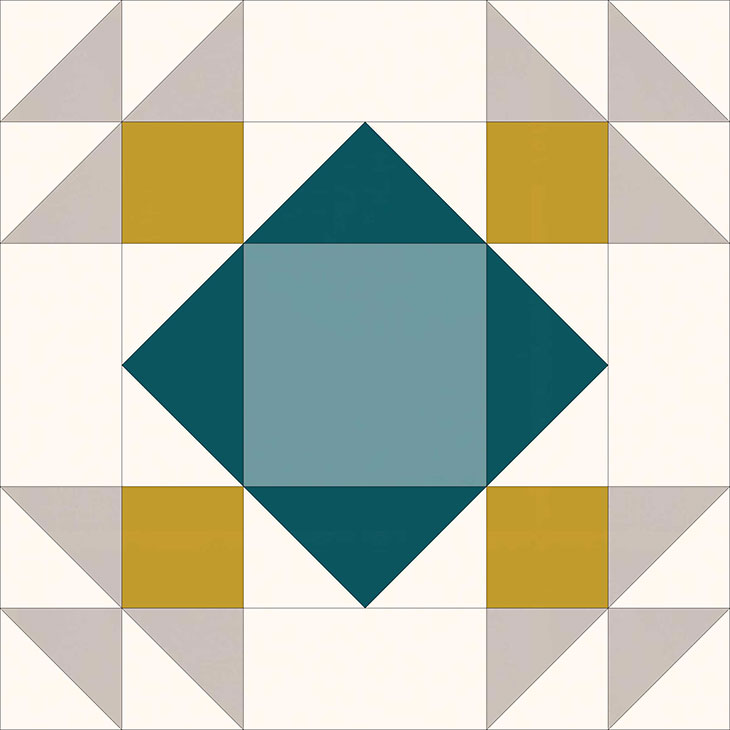
Hello, hello! We've got block 5 of the Farmhouse Sampler quilt coming at you today and it's simply gorgeous! It's called Summer Winds, and it's chock full of HSTs and a few flying geese. We hope you love it!
Before we jump in to the tutorial, we wanted to remind you that we're over on Instagram @bloomeriefabrics. We would really love for you to join us over there and share your progress by using #farmhousesamplerquilt on your pictures.
Now let's get started!

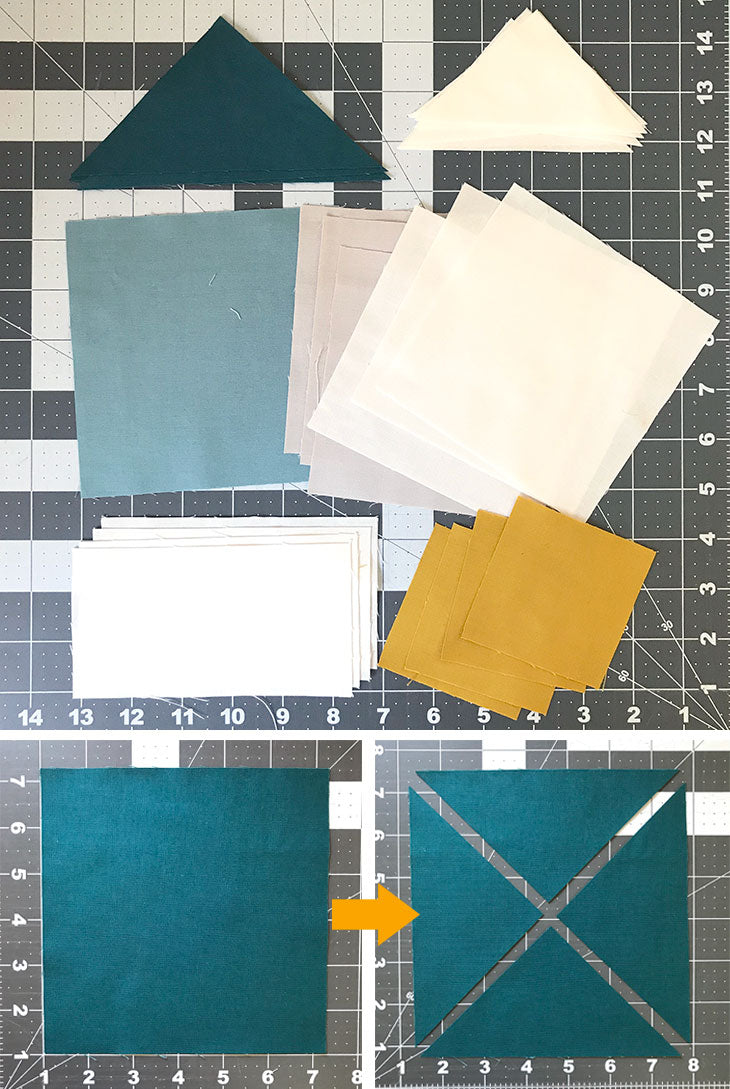
CUT:
- three (3) 5" squares from A
- three (3) 5" squares from B
- four (4) 3-3/8" squares from E, cut on the diagonal (yields 8 triangles)
- four (4) 3" x 5-1/2" rectangles from C
- four (4) 3" squares from D
- one (1) 6-1/4" square from F, cut on both diagonals (yields 4 triangles; shown in bottom 2 images above)
- one (1) 5-1/2" square from G
PRESS. With a hot iron, press blocks to release wrinkles and creases.

PLACE RST. Place “A” blocks RST with “B” blocks and sew 1/4” seam around all 4 sides. (For greater accuracy, draw the line with a pencil and then sew on the line.) Repeat for other 2 sets.
CUT. Using your ruler, cut your block on the diagonal (45 degree). Then cut again on the other diagonal. Repeat for other 2 sets. You'll now have 12 "A/B" HST units.
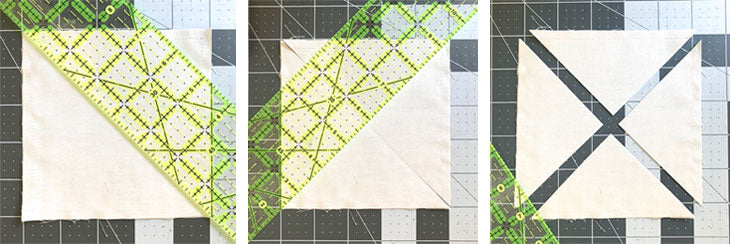
PRESS. With a hot iron press your HSTs while still closed, and then press again, with seams to the darker side.
TRIM. Using a square ruler, trim your blocks to 3” square. (To do this, line up the 45 degree/diagonal line on your ruler with the diagonal between your 2 prints at 3-1/4" square. Trim top and right edges. Turn the block to trim other 2 edges. Line up the diagonal on your ruler with the diagonal on the fabric, at 3" square. Trim top and right edges.) Repeat for all 12 HST units.
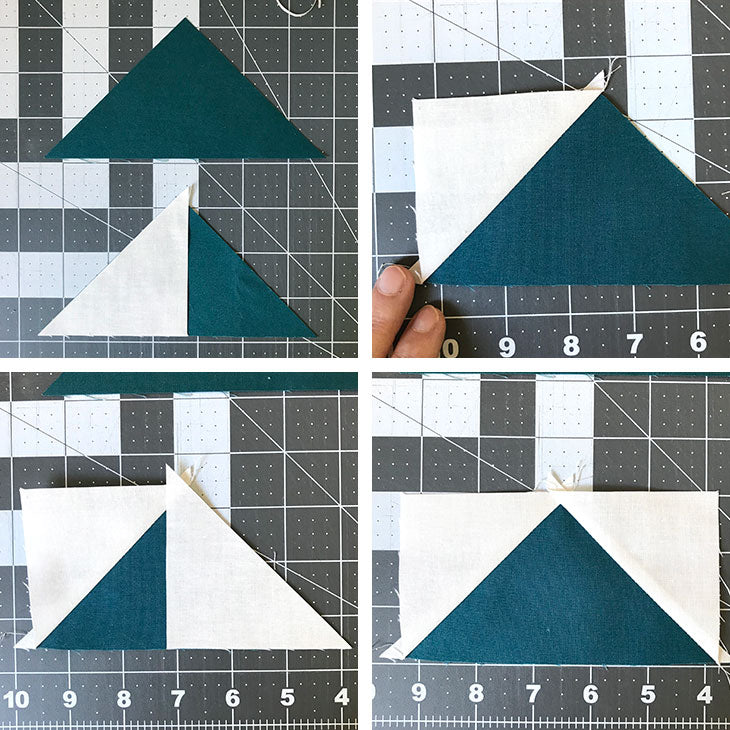
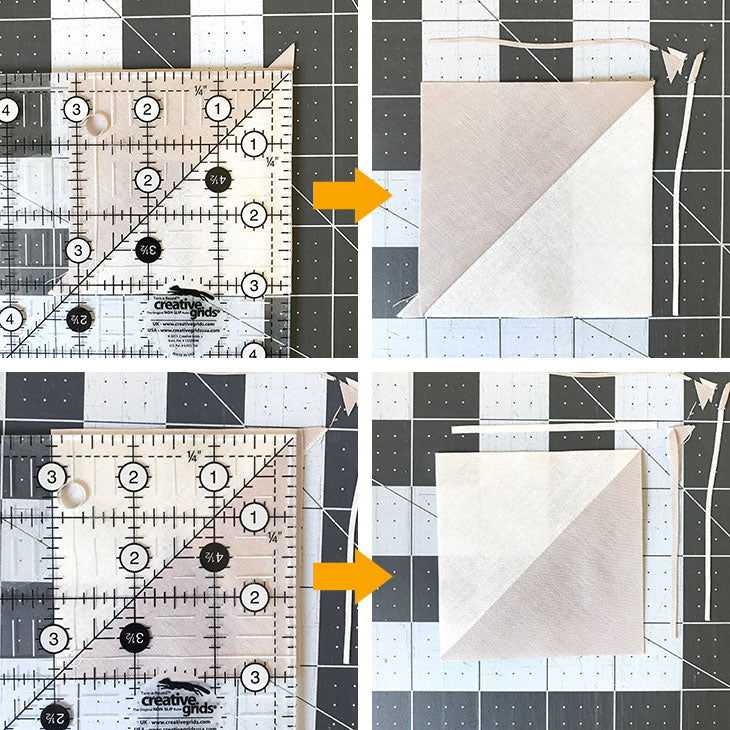
FLYING GEESE. Place 1 “E” block RST with 1 “F” block. Align the blocks along the diagonal edge and bottom. (Your “E” block will overhang the “F” block at the top point.) Carefully sew 1/4” seam allowance along the diagonal/bias edge. With a hot iron, press the seam to the outside. Repeat steps for the other side and then press your seam out. Repeat these steps for the other 3 flying geese units. Your blocks should measure 3” x 5-1/2”. Trim off dog ears.
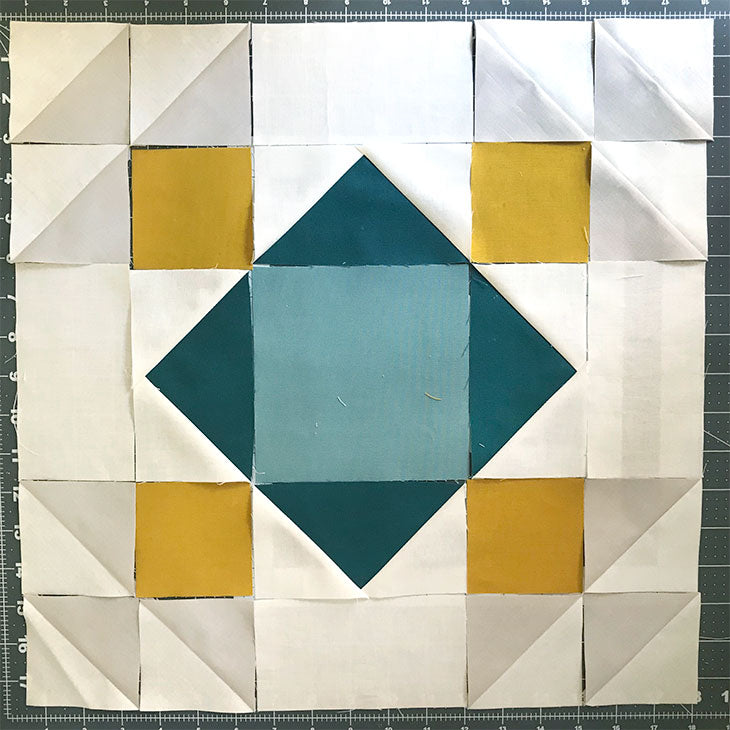
LAY OUT. Using your block diagram as a guide, lay out your block.
PIECE, PRESS, REPEAT. Piece your block. Press between blocks as you go, alternating the direction you press your seams so that seams that will be joined can be nested. Piece, press, and repeat until the block is complete.
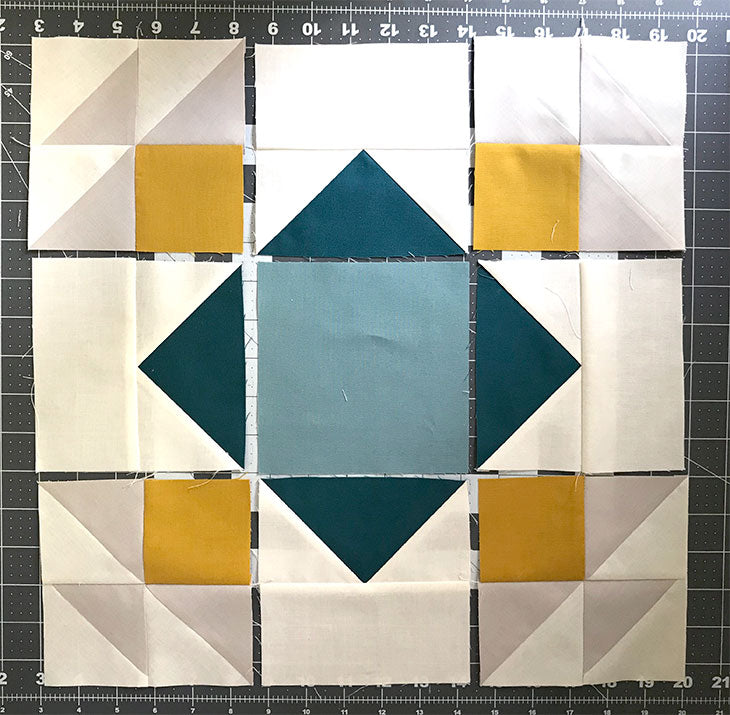
Note: For Summer Winds, you can piece your blocks in rows and then piece the rows to one another OR you can piece your block by working in sections and then piecing those sections together (as shown above). I find it easier to work in sections for this block, but do what’s most comfortable for you.)
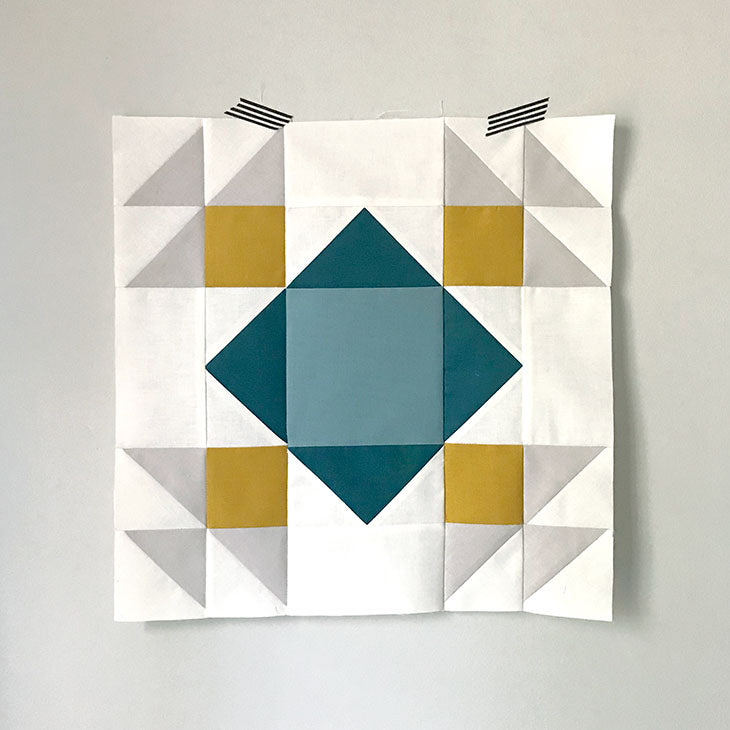
PRESS. With a hot iron, press your seams and your block is done! It will measure 15-1/2” square (15” square finished).
How did you do on this one? Do you have any favorite blocks yet? Feel free to leave your comments or questions below and come share your finished blocks over on Instagram!
Found this a great challenge to put together,
cheers gen! 🤗🤗