Farmhouse Sampler - Block 1 (Yankee Puzzle)

It's week 1 of our Farmhouse Sampler quilt-along! 🎉
We're excited to get started and want to remind you that we'll be over on Instagram @bloomeriefabrics throughout the quilt-along and would love to see you over there, as well. Just use #FarmhouseSamplerQuilt on your images so we can cheer each other on and see the different fabrics every one is using.
Now on to the quilt!
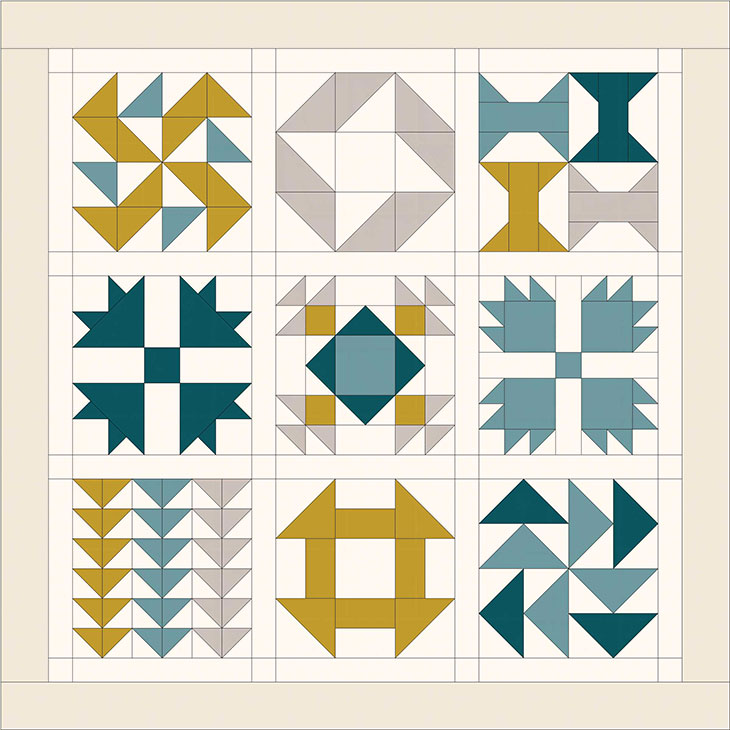
The image above shows what we'll be making over the course of the next 5 weeks. Hopefully by now you've had a chance to download the Farmhouse Sampler coloring page and plan out your quilt top by coloring in the blocks. If you've decided to use the Farmhouse Sampler solids bundle or are going scrappy, then this step is not necessary.
As mentioned in our first post, we'll be sharing 2 block tutorials each week. If you're signed up for our newsletter, we'll include a link to the latest block tutorial so you're always up-to-date (to sign up, use the "Subscribe" function in the sidebar). But you can also keep an eye on our blog to follow along.
If you're new to making quilts, I've got one little tip before you start cutting in to your fabric: be methodical with your cuts. You want to make the most of your fabric so measure twice and cut once, but also don't create unnecessary waste. I always line up my cuts against one another so I'm not losing fabric by cutting out shapes and leaving myself with a piece of fabric that looks more like Swiss cheese.
And since we're talking about cutting, here's 1 more thing you need to know: On the quilt layout above, take notice that there are 4 horizontal rows of a solid above and below the 3 rows of blocks. You may decide to do a solid all the way across (as shown), but you may have noticed that these rows are broken up in to smaller strips and squares to allow you to add more color. I'll give instructions for both once we complete the quilt blocks, but if you decide to just do 1 strip of color all the way across like me, you'll want to reserve at least a 10" x 53.5" section of your background fabric for these strips. (I'll be using FreeSpirit Designer solid in Mist.) If you don't trust yourself to remember that, go ahead and cut that section out and set it aside for later.
With all that out of the way, let's get started with the first block, the Yankee Puzzle.
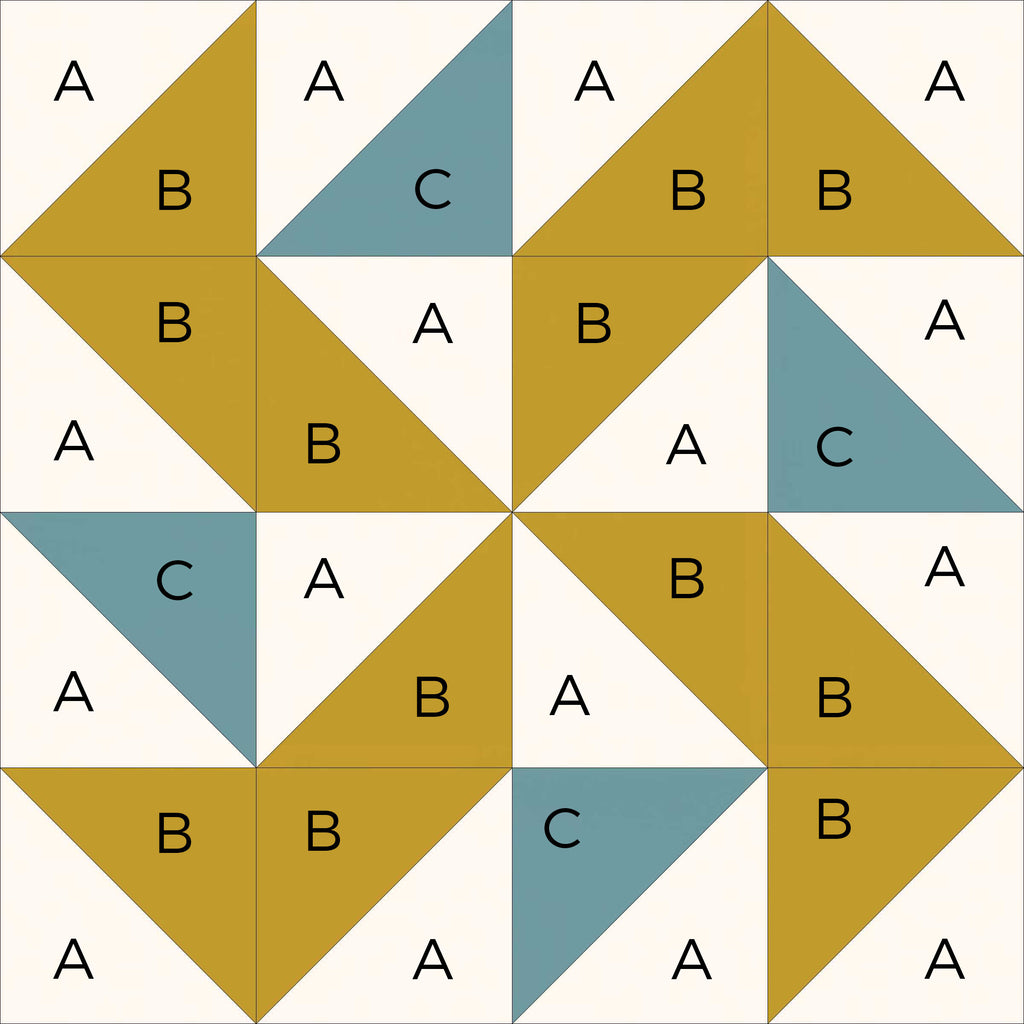
Throughout these tutorials, A is your background fabric and B-E are your four 1/2-yard fabrics.

CUT:
- four (4) 7" squares from A (we used Mist from FreeSpirit Designer Essentials)
- three (3) 7" squares from B (we used Spark Gold)
- one (1) 7" square from C (we used Malachite)
PRESS. With a hot iron -- no steam -- press your blocks to get rid of creases and wrinkles. Be sure you're pressing your blocks and not dragging the iron back and forth like you do when you iron clothes. Dragging causes distortion while pressing (lifting to move the iron) keeps your blocks straight and wave-free.
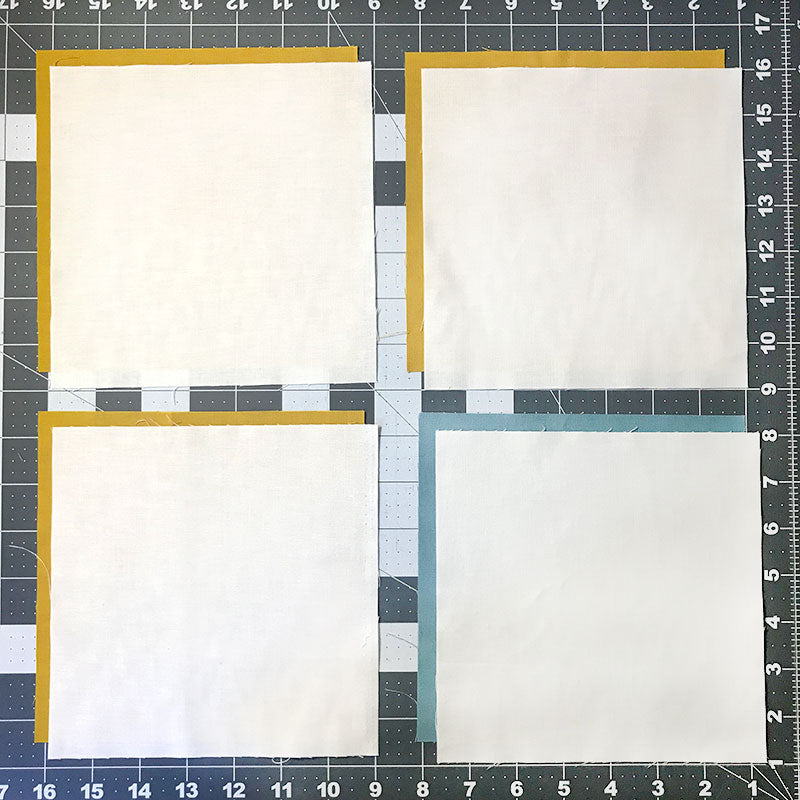
PLACE BLOCKS RST. Place your 4 "A" blocks right sides together (RST) with your 3 "B" and 1 "C" block, lining up your outer edges. (See above; mine aren't squarely on top of one another just to show you how the blocks are paired.)
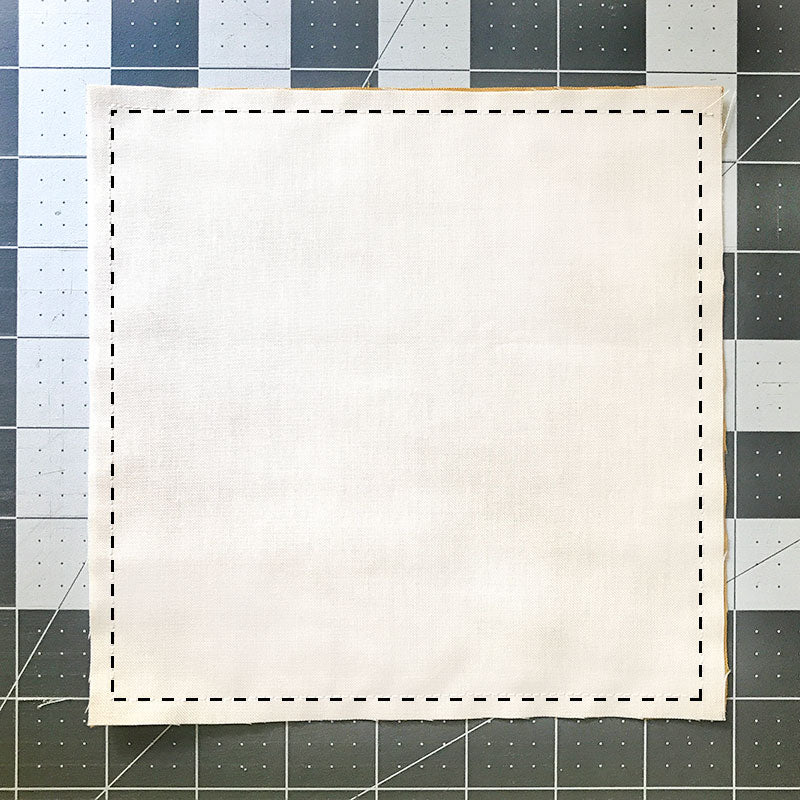
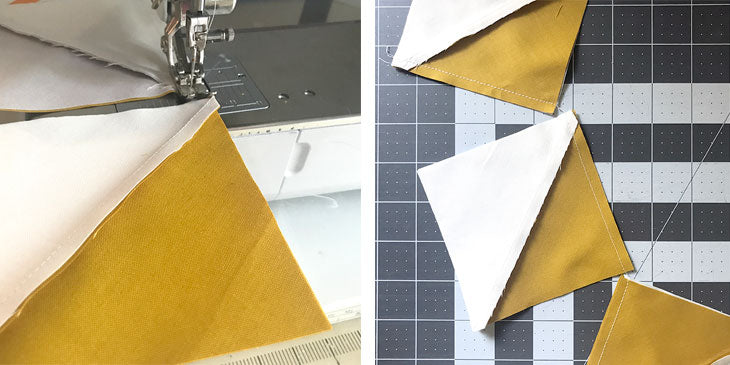
STITCH. With your blocks RST, sew 1/4" seam around the perimeter of each block as shown above. For greater accuracy, draw the lines with a pencil on the wrong side of your block before taking it to the sewing machine and simply stitch over those lines.
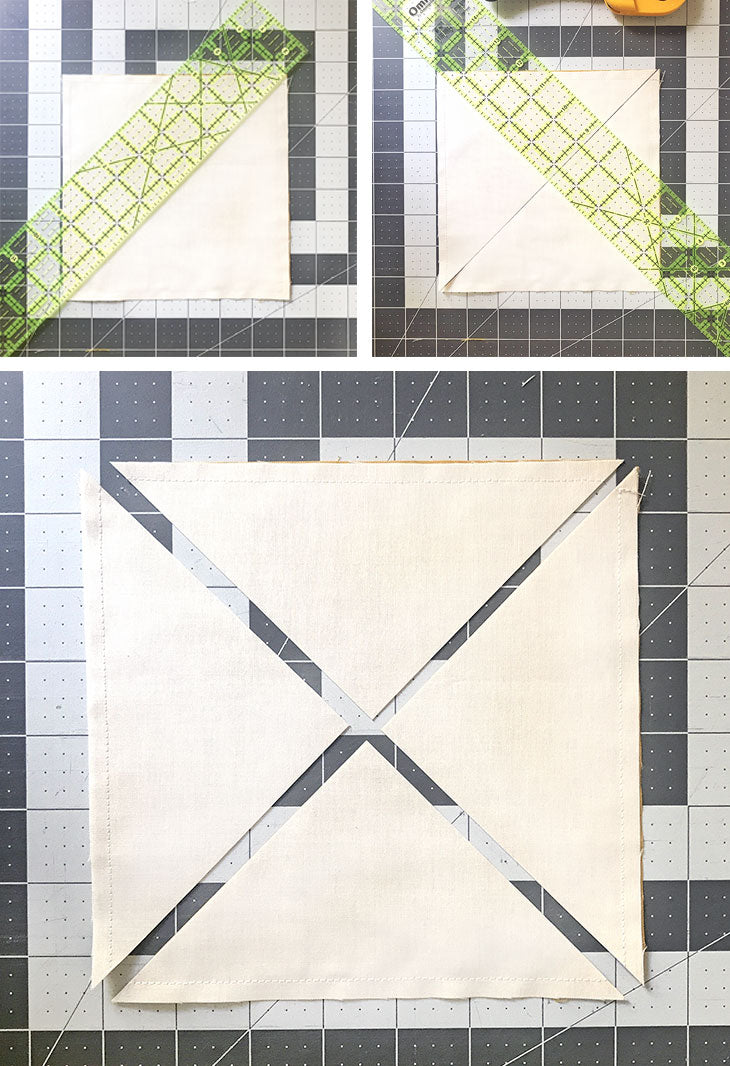
CUT. With your rotary cutter, cut diagonally through the corners of your blocks as shown above. Each square will yield 4 half-square triangles (HSTs). Be careful not to move your square between cuts. Alternatively, you can draw diagonal lines through your corners on the wrong side with a pencil and then simply cut on your lines.
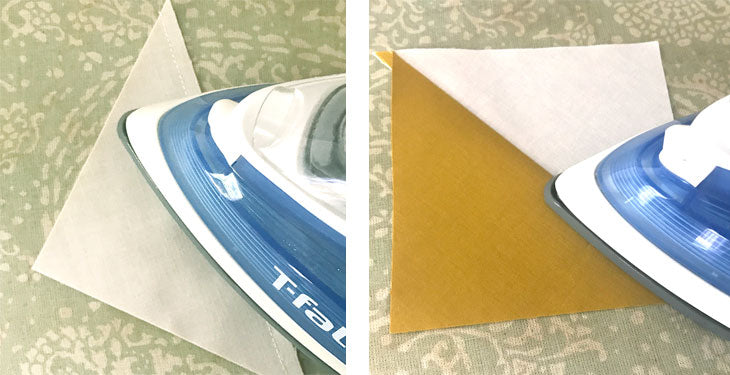
PRESS. With a hot iron (no steam), press your blocks while still closed and then again after opening them, pressing seams to the dark side as shown above.
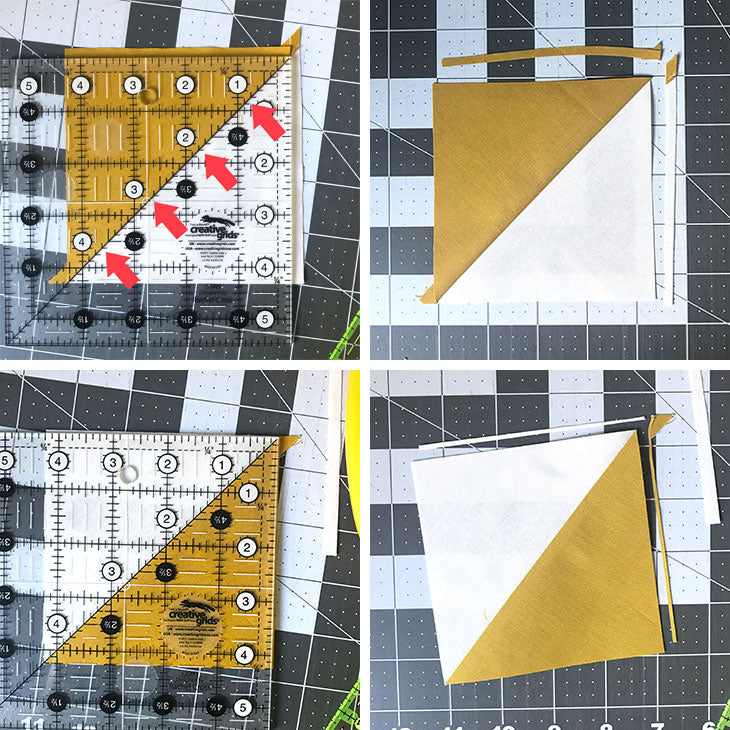
TRIM HSTs. With a square ruler, trim blocks down to 4-1/4."
To do this, line up the diagonal (45°) line on your ruler (shown with red arrows above) with the diagonal line created by your 2 triangles. Keeping the diagonal in place, align the left and bottom edges of your HST with the 4-3/8" lines on your ruler. Trim the top and right sides with your rotary cutter.
Next, rotate your block so you can trim up the other 2 sides. Line up the diagonal again and then align the left and bottom edges of your block with the 4-1/4" lines on your ruler. Trim the top and right sides with your rotary cutter. Repeat this for all 16 HSTs.
And once you've done that, take a little break to marvel at your perfect 4-1/4" HSTs. ☺️
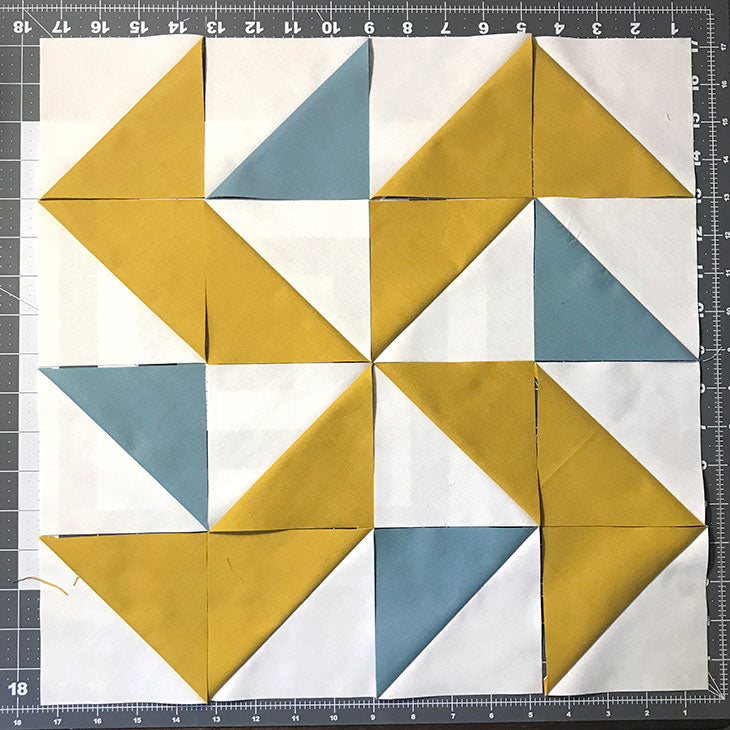
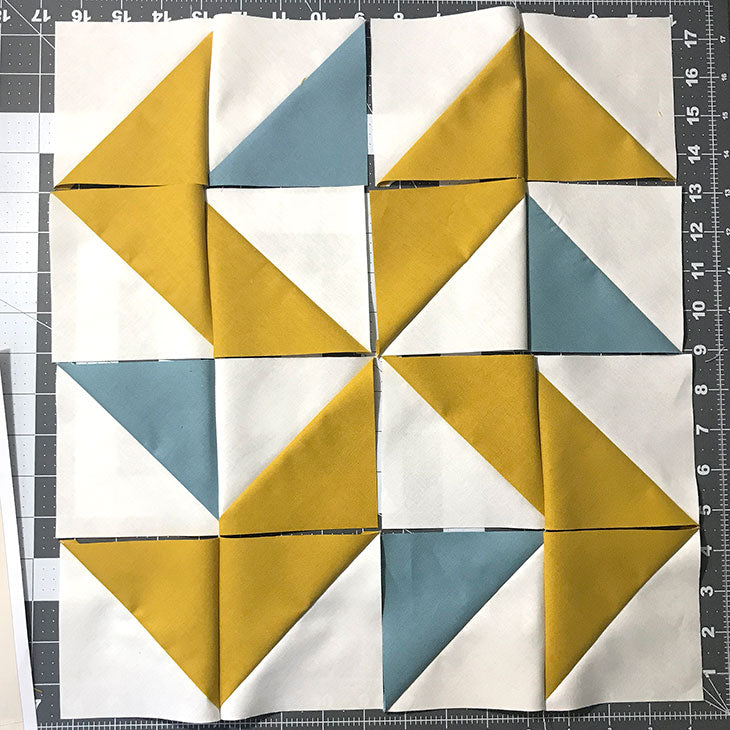
LAY OUT. With your 16 HSTs, lay out your quilt block as shown above.
CHAIN PIECE. Following your layout, chain-piece blocks together in pairs, using a 1/4" seam allowance. Snip threads between your blocks.
LAY OUT. Lay out your block again with the pieced pairs in rows, as shown above.
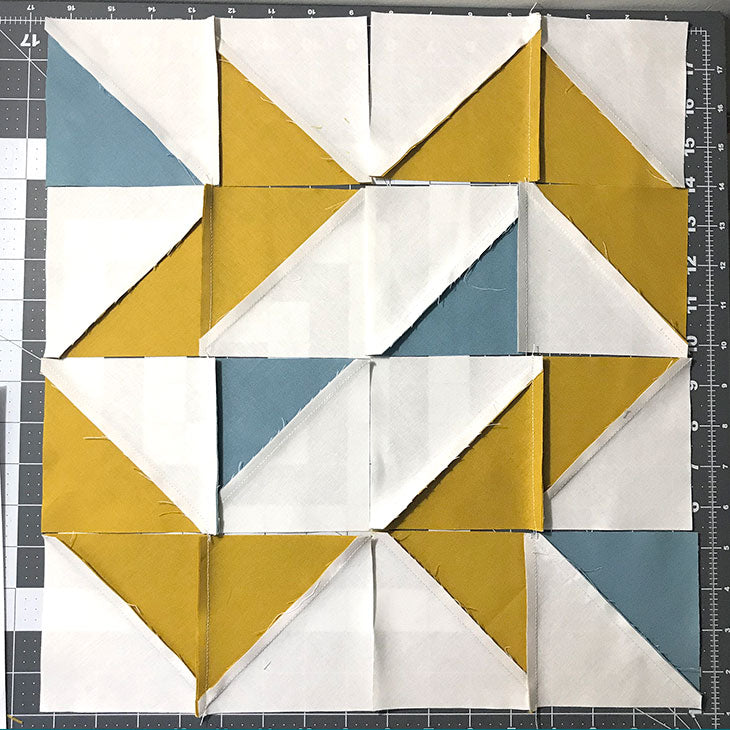
PRESS. Press your blocks, with seams to one side. Alternate pressing your seams to the right and left on your rows. (First row blocks, press right. Second row, press left. And so on.) This will let us nest our seams to ensure that points match and everything meets up nicely.
LAY OUT. Lay out your blocks again and piece the block pairs RST to make rows. Press seams to the side, following the pressing suggestion in the step above.
You now have four rows. Lay them out according to the block diagram and sew the first and second rows RST, followed by the third and fourth. Because we alternated which way we pressed our seams, you'll be able to nest your seams to create perfect points between your blocks.
You now have 2 pieces: the top 2 rows and the bottom 2 rows. With RST, piece the top and bottom halves together using a 1/4" seam allowance.
PRESS. Press your seams to one side and give your final block a good press from the front.
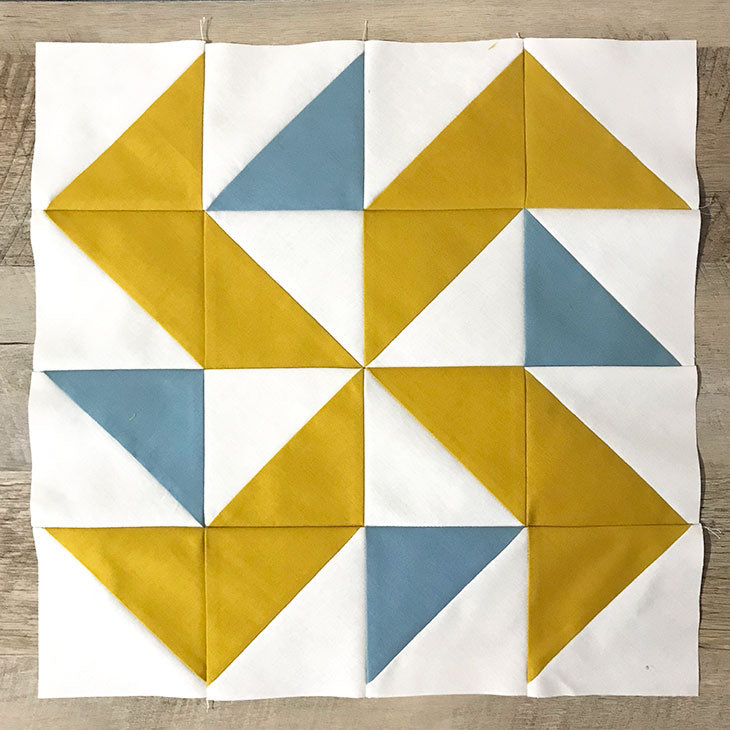
Your final, unfinished block should measure about 15-1/2" square. Once you piece your entire quilt top, each block will measure 15" finished.
How'd you do? Show us your blocks on Instagram by tagging them with #FarmhouseSamplerQuilt. If you have questions, feel free to leave them in the comments so everyone can benefit from the answers. Also, if you're coming from other quilting/sewing websites, please consider supporting our shop so we can continue creating free blocks, tutorials, and patterns for you!
I love how you explain each step I’m new to quilting so I’m trying to learn as much as I can. Thank you
Thank you so much for making the color schemes to easy to follow.
Hi Elizabeth! I like to trim all the edges of my blocks so I have nice, straight edges for the next steps. So I trim my blocks in 2 steps to get all 4 sides. (That’s just how I cut. If you like to trim yours down in 1 fell swoop, do what works best for you.) If you’re working on a smaller block, your trim sizes will be different than the ones listed in this tutorial. Hope that helps!
I’m working on a 12" fin. blk. Sure appreciate you listing the piece size after Bonnie’s request. I bought 3 rulers for cutting HST’s and just 1 is appropriate got the cuts. I thought I could cut using the 45° line with a square, but I’m not getting why you used 4-3/4" for the line to use for first cuts, then 4-1/4" to finish. Can you explain the math for that?
Hey Bonnie! I did some quilty maths for you…for a 12" finished block, using the same 4-from-1 HST technique in this tutorial, you should cut your initial blocks at 6" square and then trim them down to 3-1/2" square from there. That should give you a 12" finished block. (Double-check me before you go all in, though.) Hope that helps! Let us know how it turns out!