Pumpkin Patch Quilt Block Tutorial

When it's fall, it's time for all things pumpkin. So let's make some adorable pumpkin patch quilt blocks! Warning though: these are totally addictive to make. And they come together quickly so you'll have lots of pumpkins in your pumpkin patch in no time!
(Need fabric? Browse our selection of halloween fabric.)
For each pumpkin block, you'll need to cut:
- 1 - 8" x 7" rectangle for the pumpkin
- 1 - 2" x 3-1/2" rectangle for the pumpkin stem
- 5 - 2" x 2" squares of background fabric
- 2 - 3-1/2" x 3-1/2" squares of background fabric
Now let's get started!

Step 1:
We're working on our pumpkins first!
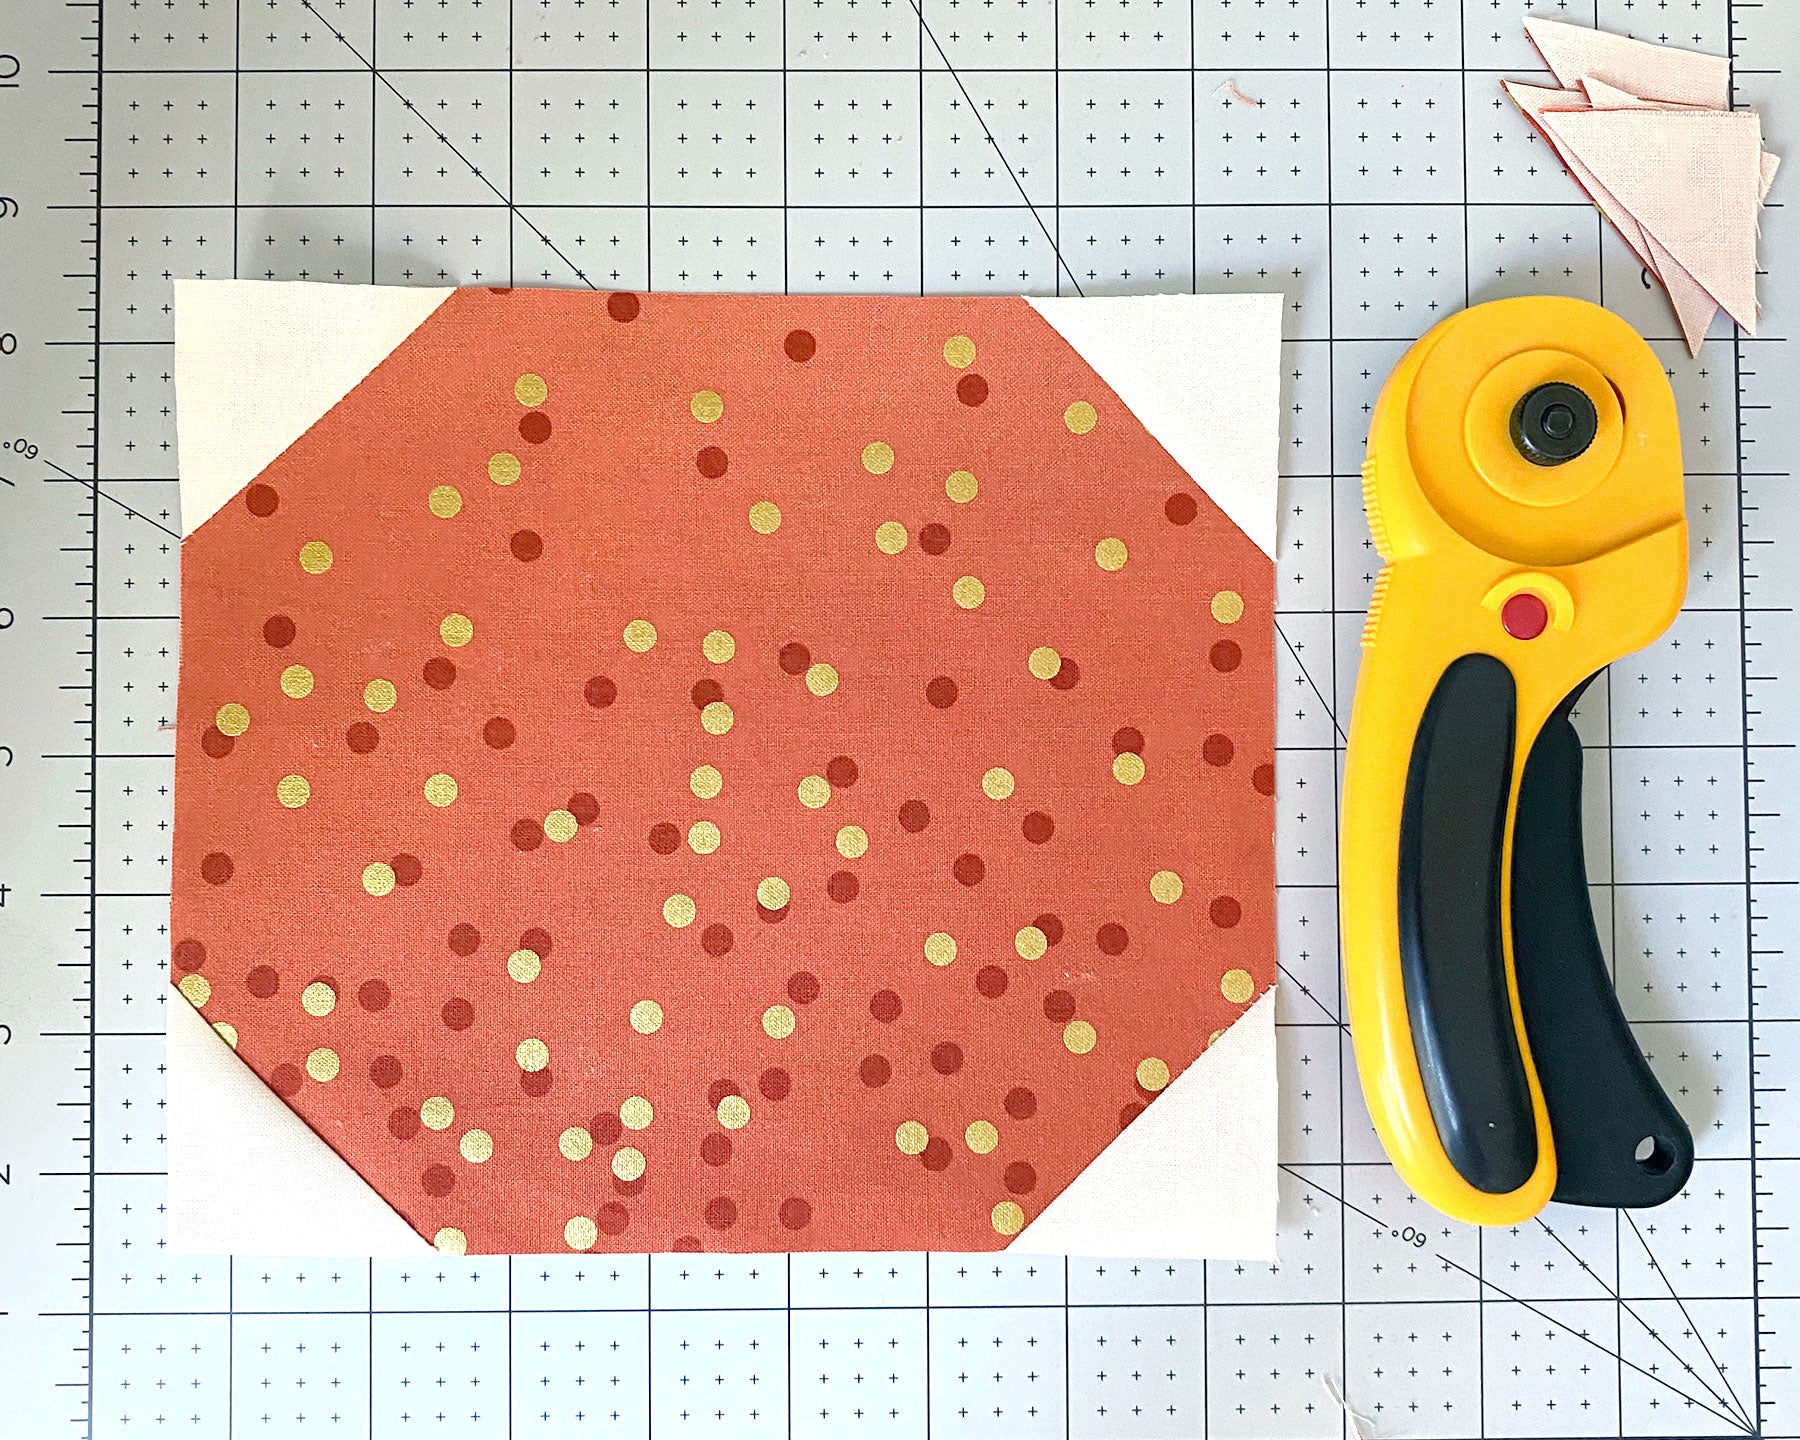
You'll need the 8" x 7" rectangle and 4 of the 2" x 2" squares. Place the 2" squares RST (right sides together) at all 4 corners of the block, just like shown in the image above. Clip or pin in place.
TIP: I like to fold my 2" squares on the diagonal to crease them so I know where to stitch in the next step. If you prefer a different technique, like marking it, using a stitch guide, or something else, by all means, use what works for you.

Step 2:
Stitch along the diagonal creases for all 4 corner blocks.
TIP: I like to stitch just a wee bit to the outside of my crease lines to account for the width that my thread takes up. (I'm using a 3-ply 50wt thread.) This way, when I fold my corners back and press, the outer edges of my blocks will line up and not be short.

Step 3:
Once you've got all 4 blocks sewn on, trim off the corners using 1/4" seam allowance. (You'll use your ruler and trim 1/4" away from your stitch line, just like shown above.)
Step 4:
Press open the corners of your quilt block with an iron. Now you've got the bottom part of your pumpkin block! Easy, right?

Step 5:
Now let's work on the stem. You'll need the last 2" x 2" square and the 2" x 3-1/2" rectangle. Place them RST along the top.
Again, I like to crease my square along the diagonal so I know where to stitch in the next step.
Step 6:
At your sewing machine, stitch along the diagonal line.

Step 7:
Trim the corner using a 1/4" seam allowance.

Step 8:
Using your iron, press the block open. (For these blocks, I pressed all my seams to one side. If you prefer to press seams open, that works, too!)

Step 9:
For this next step, we'll need the two 3-1/2" square blocks and the stem piece we just finished.
Place 1 of the 3-1/2" square blocks RST with the stem piece, as shown above, lining up along the right edge. Clip or pin in place. At your sewing machine, sew using 1/4" seam allowance.
Finger press open (which just means: use your fingers to press the 2 blocks open).

Step 10:
Now, place the remaining 3-1/2" square block RST over the stem. Line the blocks up along the right edge, as shown in the image above. (I've lifted the top block back so you can see the stem block below. These are the edges we're lining up.)
Clip or pin in place. At your sewing machine, sew a 1/4" seam allowance.

Step 11:
Now you have 2 assembled pieces, just like shown above. Take a moment and press your blocks flat with an iron.
Let's get ready to sew these pieces together!

Step 12:
Place the 2 assembled pieces RST, lining the stem and pumpkin edges like shown above. (If you used a directional print for the pumpkin, make sure you line up the correct edge.)
Clip or pin in place and sew 1/4" seam along the edge.
Press the block, with seams to 1 side. Then open up your block, and give it 1 more good press.

And guess what?! You're done....
Unless you want to make lots more. 🎃

Fun to make. Easy to follow instructions!
So easy and very clear instructions.