Updated!
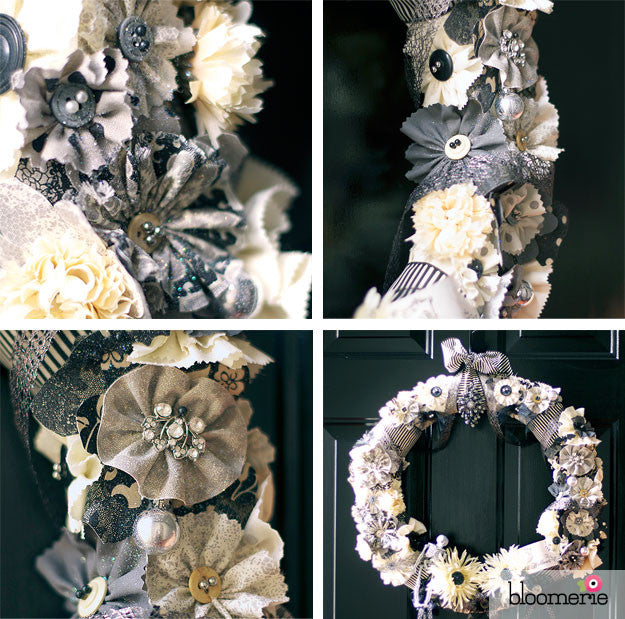
I made a Halloween wreath a few years back using some Basic Grey fabrics; it was very black, grey, silver, cream, and slightly manor creepy. The wreath was packed with fabric rosettes, tulle bats, whispy spiderweb ribbon, rhinestone brooches, and lots more. It was easy to make, especially since it's all pinned to a straw wreath base.
Want to make your own? The fabric I used is long gone from our shelves, but Happy Halloweeny, Fall Goodness, and Moda Bella solids would all work perfectly for this fun project. Here's the gist (no sewing machine required).
NEEDS: straw wreath base, coordinating fabrics, jelly roll (or 2.5" x 44" strips), various widths of decorative ribbons, buttons, flat and pearl-head pins, Halloween baubles, adhesive spray & glitter.
-
Wrap the wreath base completely with fabric strips (I used a cream solid). This gives a finished look and protects your door from scratches. (Anyone else just re-paint the front door? Don't want to mess that up!) Pin the strips in place with flat-head pins, as needed.
- Next, wrap a wide ribbon around the wreath as an accent -- no need to completely cover it. You'll fill in the gaps with lots of pretties. Save some of this ribbon for a hanging loop.
-
Make fabric flowers. I used a variety of techniques to give the wreath loads of interest. For some, I hand-basted the edges of the fabric strips loosely and pulled the threads to form a round flower shape. For others, I cut out flower shapes and layered them to create dimension.
-
Attach your flowers using buttons and pearl-head pins to secure them to the base.
-
Customize with additional trims and baubles, such as brooches, silk flowers, and tiny ornaments. Add a hanging loop.
- Finally, finish the wreath with a light spray of adhesive and a generous sprinkling of glitter.
That's it! Feel free to leave comments below. And if you're wondering who claimed the wreath shown in the photos... just ask Jess.


So glad y’all like it! Definitely a great project for fabric scraps - and we also love that it doesn’t scream Halloween (which means I can keep it hanging up a little while longer). :)
This is beautiful. I love that there are no bats or eyes on it. It is elegant and beautiful.
I love this too! I was going to make some Christmas wreaths with my fabric scraps and I found some $1 wreath forms in the Target dollar aisle! Now I have some direction on how to make them. Thanks for the inspiration. :)
I love this!! Great Job!!